circuit 2 examples
Circuit 2 is associated with the Tyer 'Black Box' instruments. Wiring diagram SWD 301A clearly shows one of these instruments, but an identical commutator is found on many of the 'North Eastern' double line blocks.
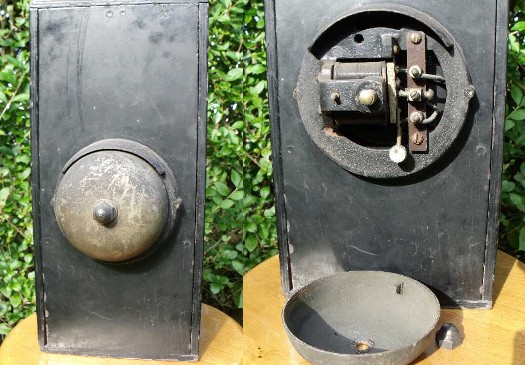
Unlike Circuit 1, the relays to provide the block control functions were in a separate unit outside the block instrument. Nevertheless, the instruments are not without interest: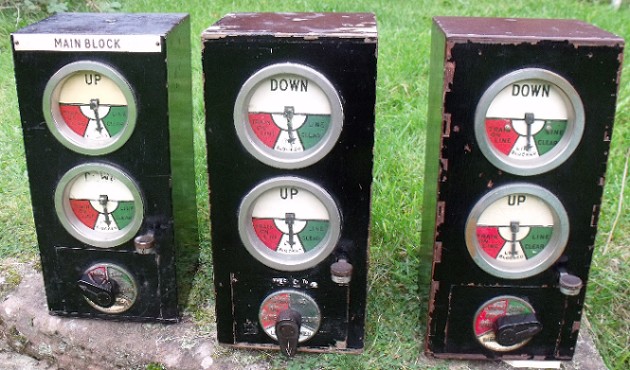 The bell is located on the back of the instrument:
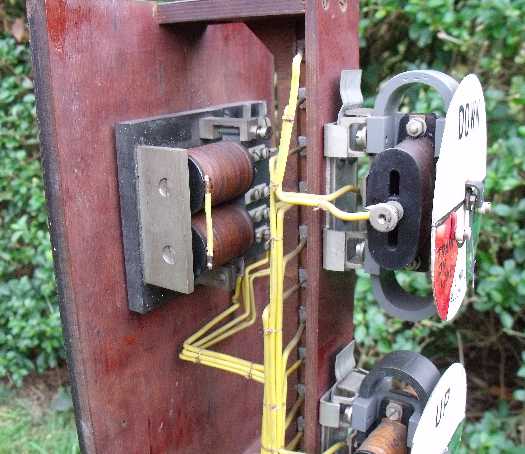
 Example 1 - block bell relay
These instruments have the option to incorporate a block bell relay,
so that the solenoid for the bell striker is operated by a local
power supply, and not directly connected to the block line. Here's
an example of the relay:
Example 1 - block bell relay
These instruments have the option to incorporate a block bell relay,
so that the solenoid for the bell striker is operated by a local
power supply, and not directly connected to the block line. Here's
an example of the relay:
 Example 2 - shorting plug instead of relay
Some instruments were fitted with shorting plug instead, so that the bell striker
solenoid was directly connected to the block line:
Example 2 - shorting plug instead of relay
Some instruments were fitted with shorting plug instead, so that the bell striker
solenoid was directly connected to the block line:
 Note also the red lettering on the upper needle unit, and the white line down the centres
of the pointers - these features are not usually present.
Example 3 - free block (?)
The next example has neither bell relay nor shorting plug - so the bell has
been disconnected (of course, the relay or plug could have
been removed after it was taken
out of service). The bell itself is still present on the rear of the instrument,
and the bell tapper was obviously used (terminals 1 to 3 have
remains of wire attached to them).
Note also the red lettering on the upper needle unit, and the white line down the centres
of the pointers - these features are not usually present.
Example 3 - free block (?)
The next example has neither bell relay nor shorting plug - so the bell has
been disconnected (of course, the relay or plug could have
been removed after it was taken
out of service). The bell itself is still present on the rear of the instrument,
and the bell tapper was obviously used (terminals 1 to 3 have
remains of wire attached to them).
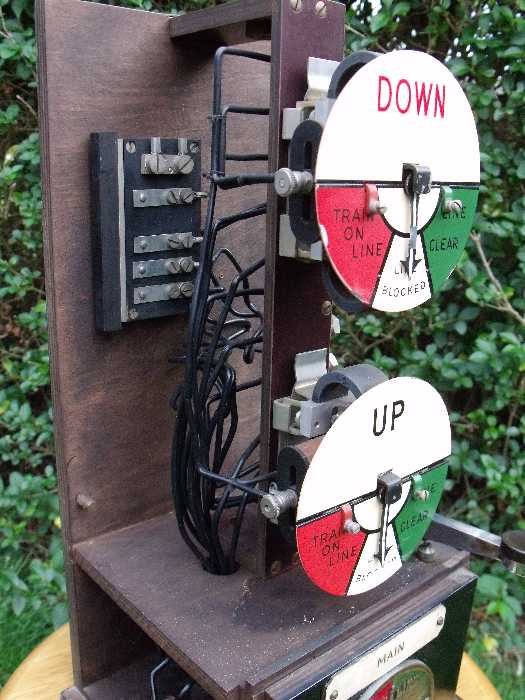
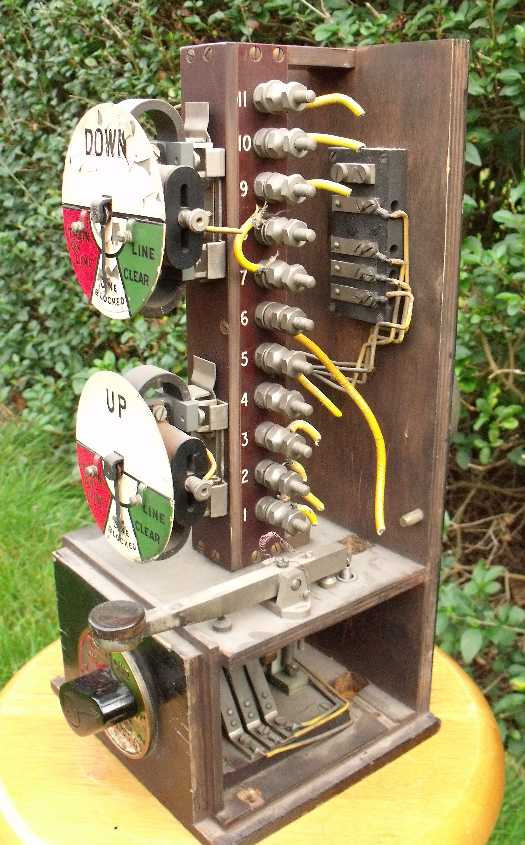 Unfortunately, whoever removed the instrument
did a very thorough job, and cut the wires so short that no wiring labels remain - a
pity, as these might have revealed its origin! But they didn't remove all evidence:
look carefully and you will see that terminals 7 and 8 are linked, also there is no
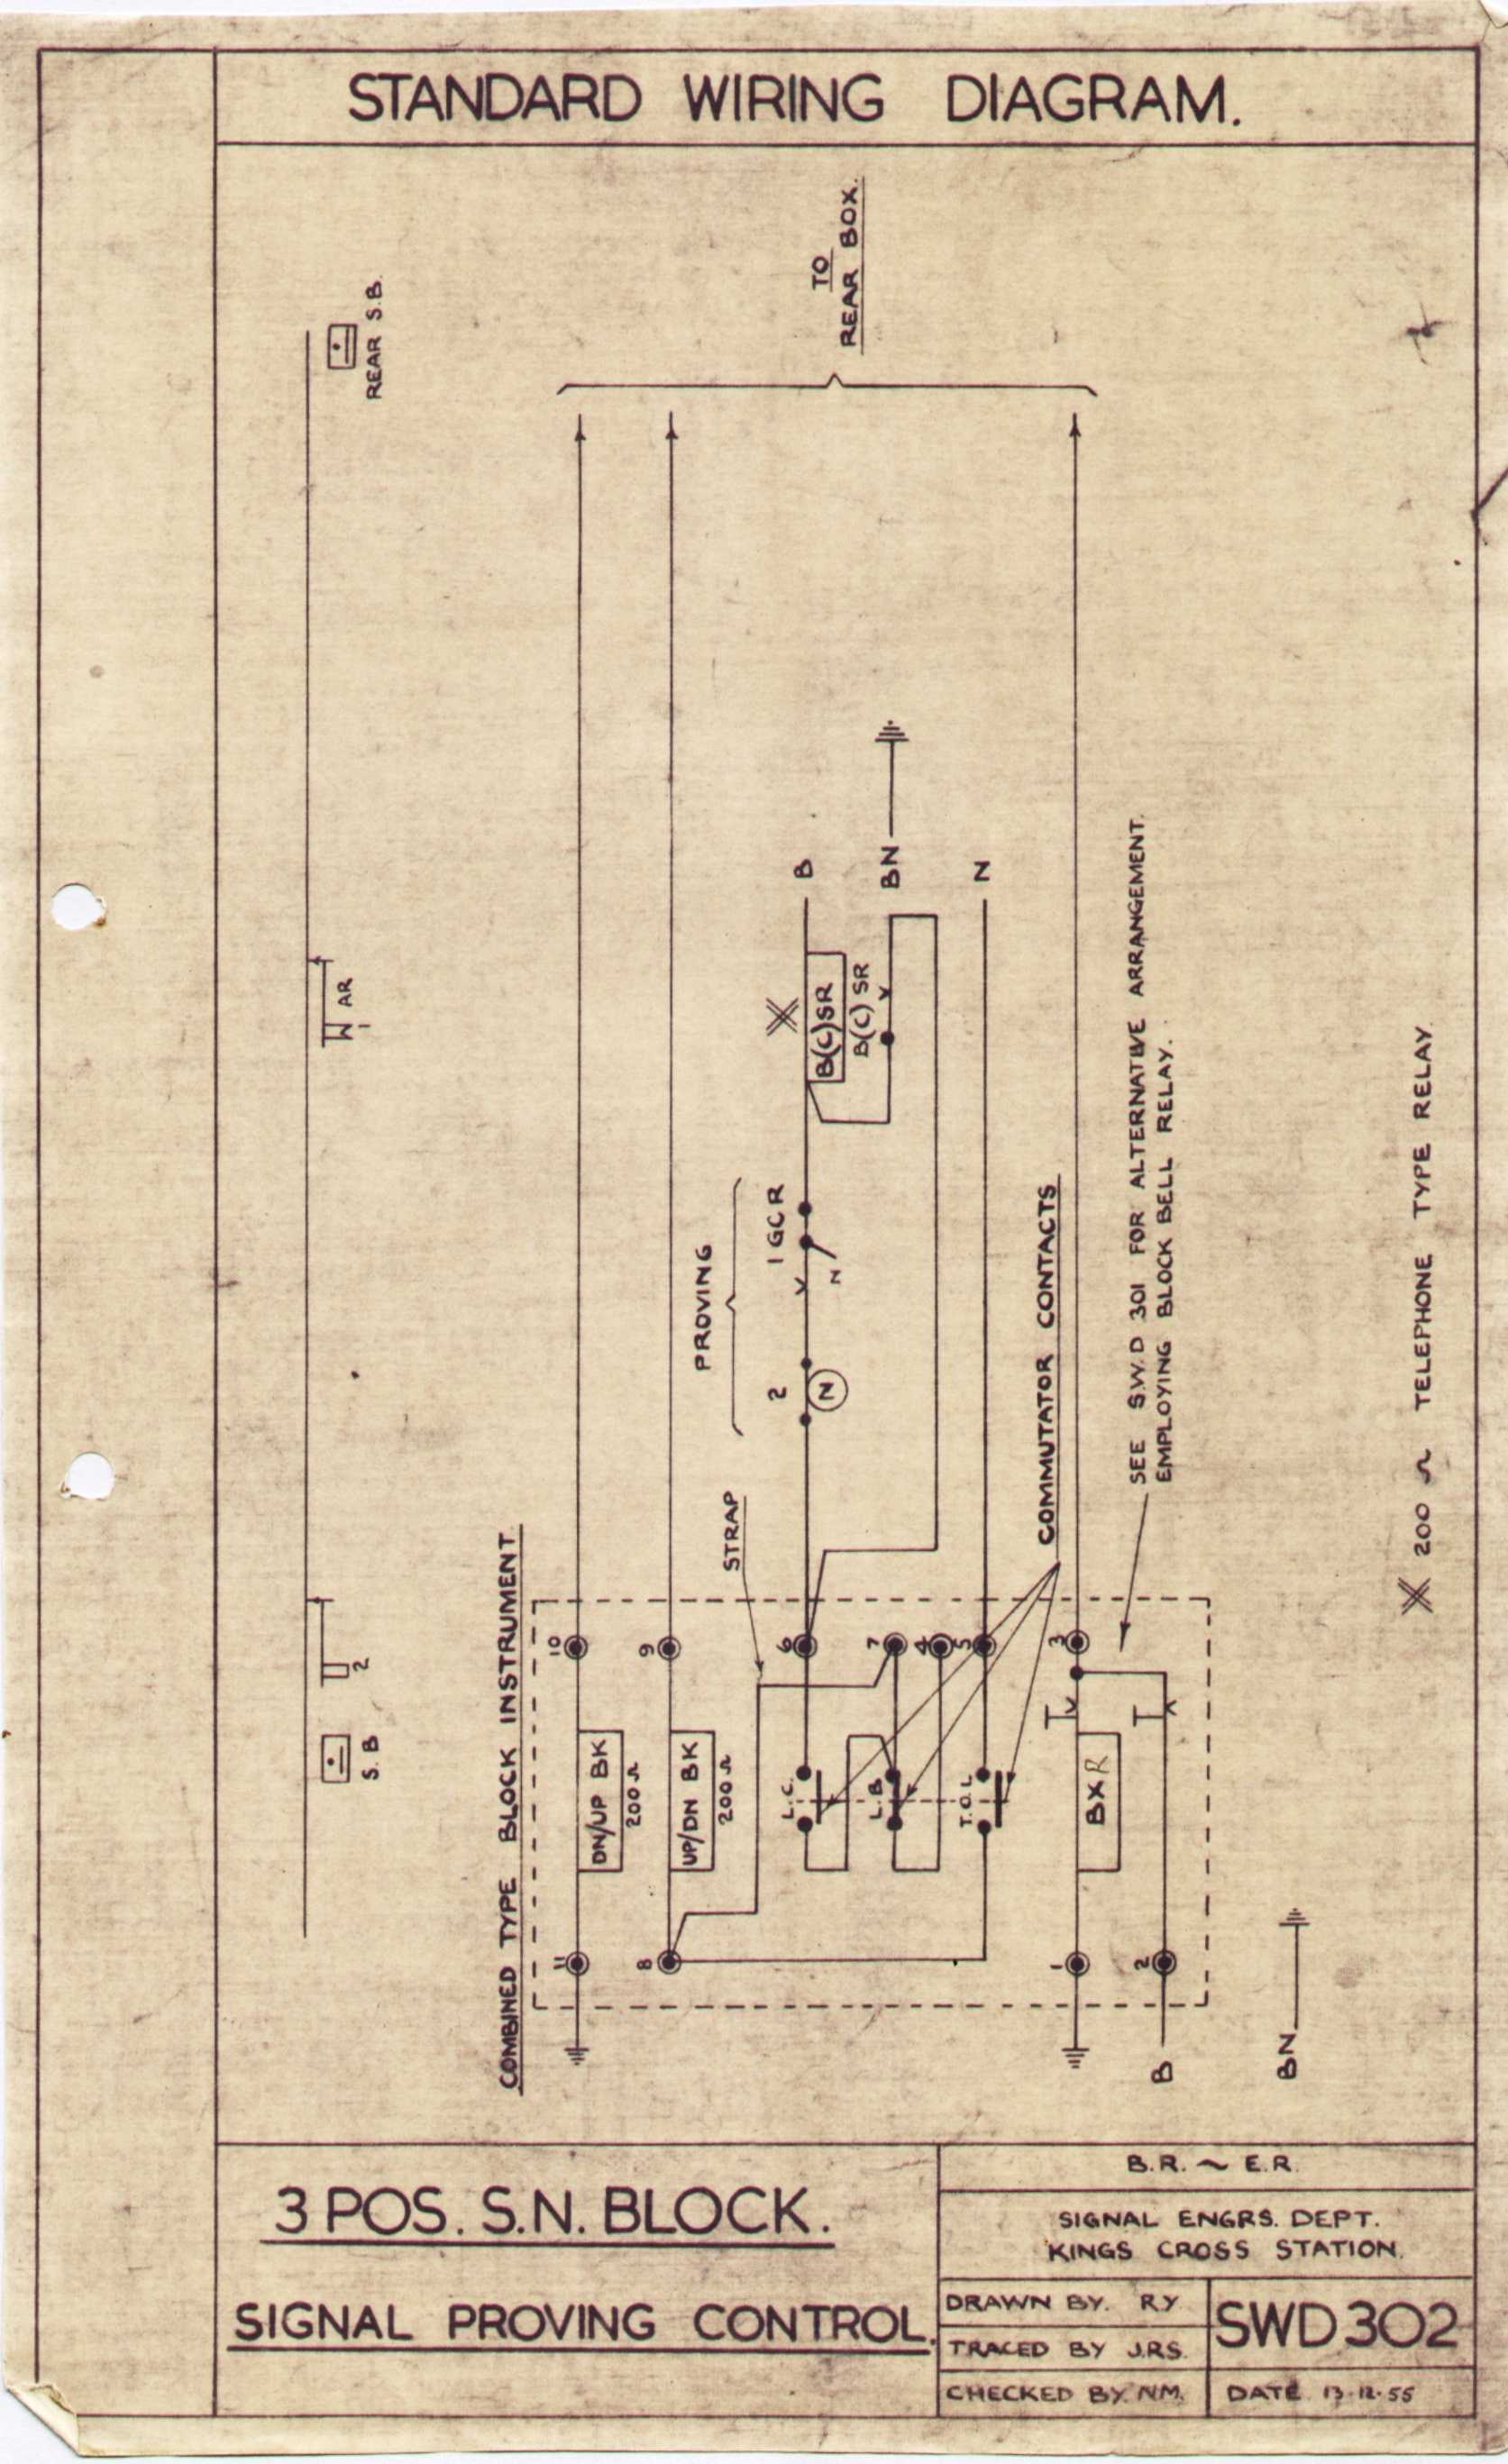
connection to terminal 4. This shows the
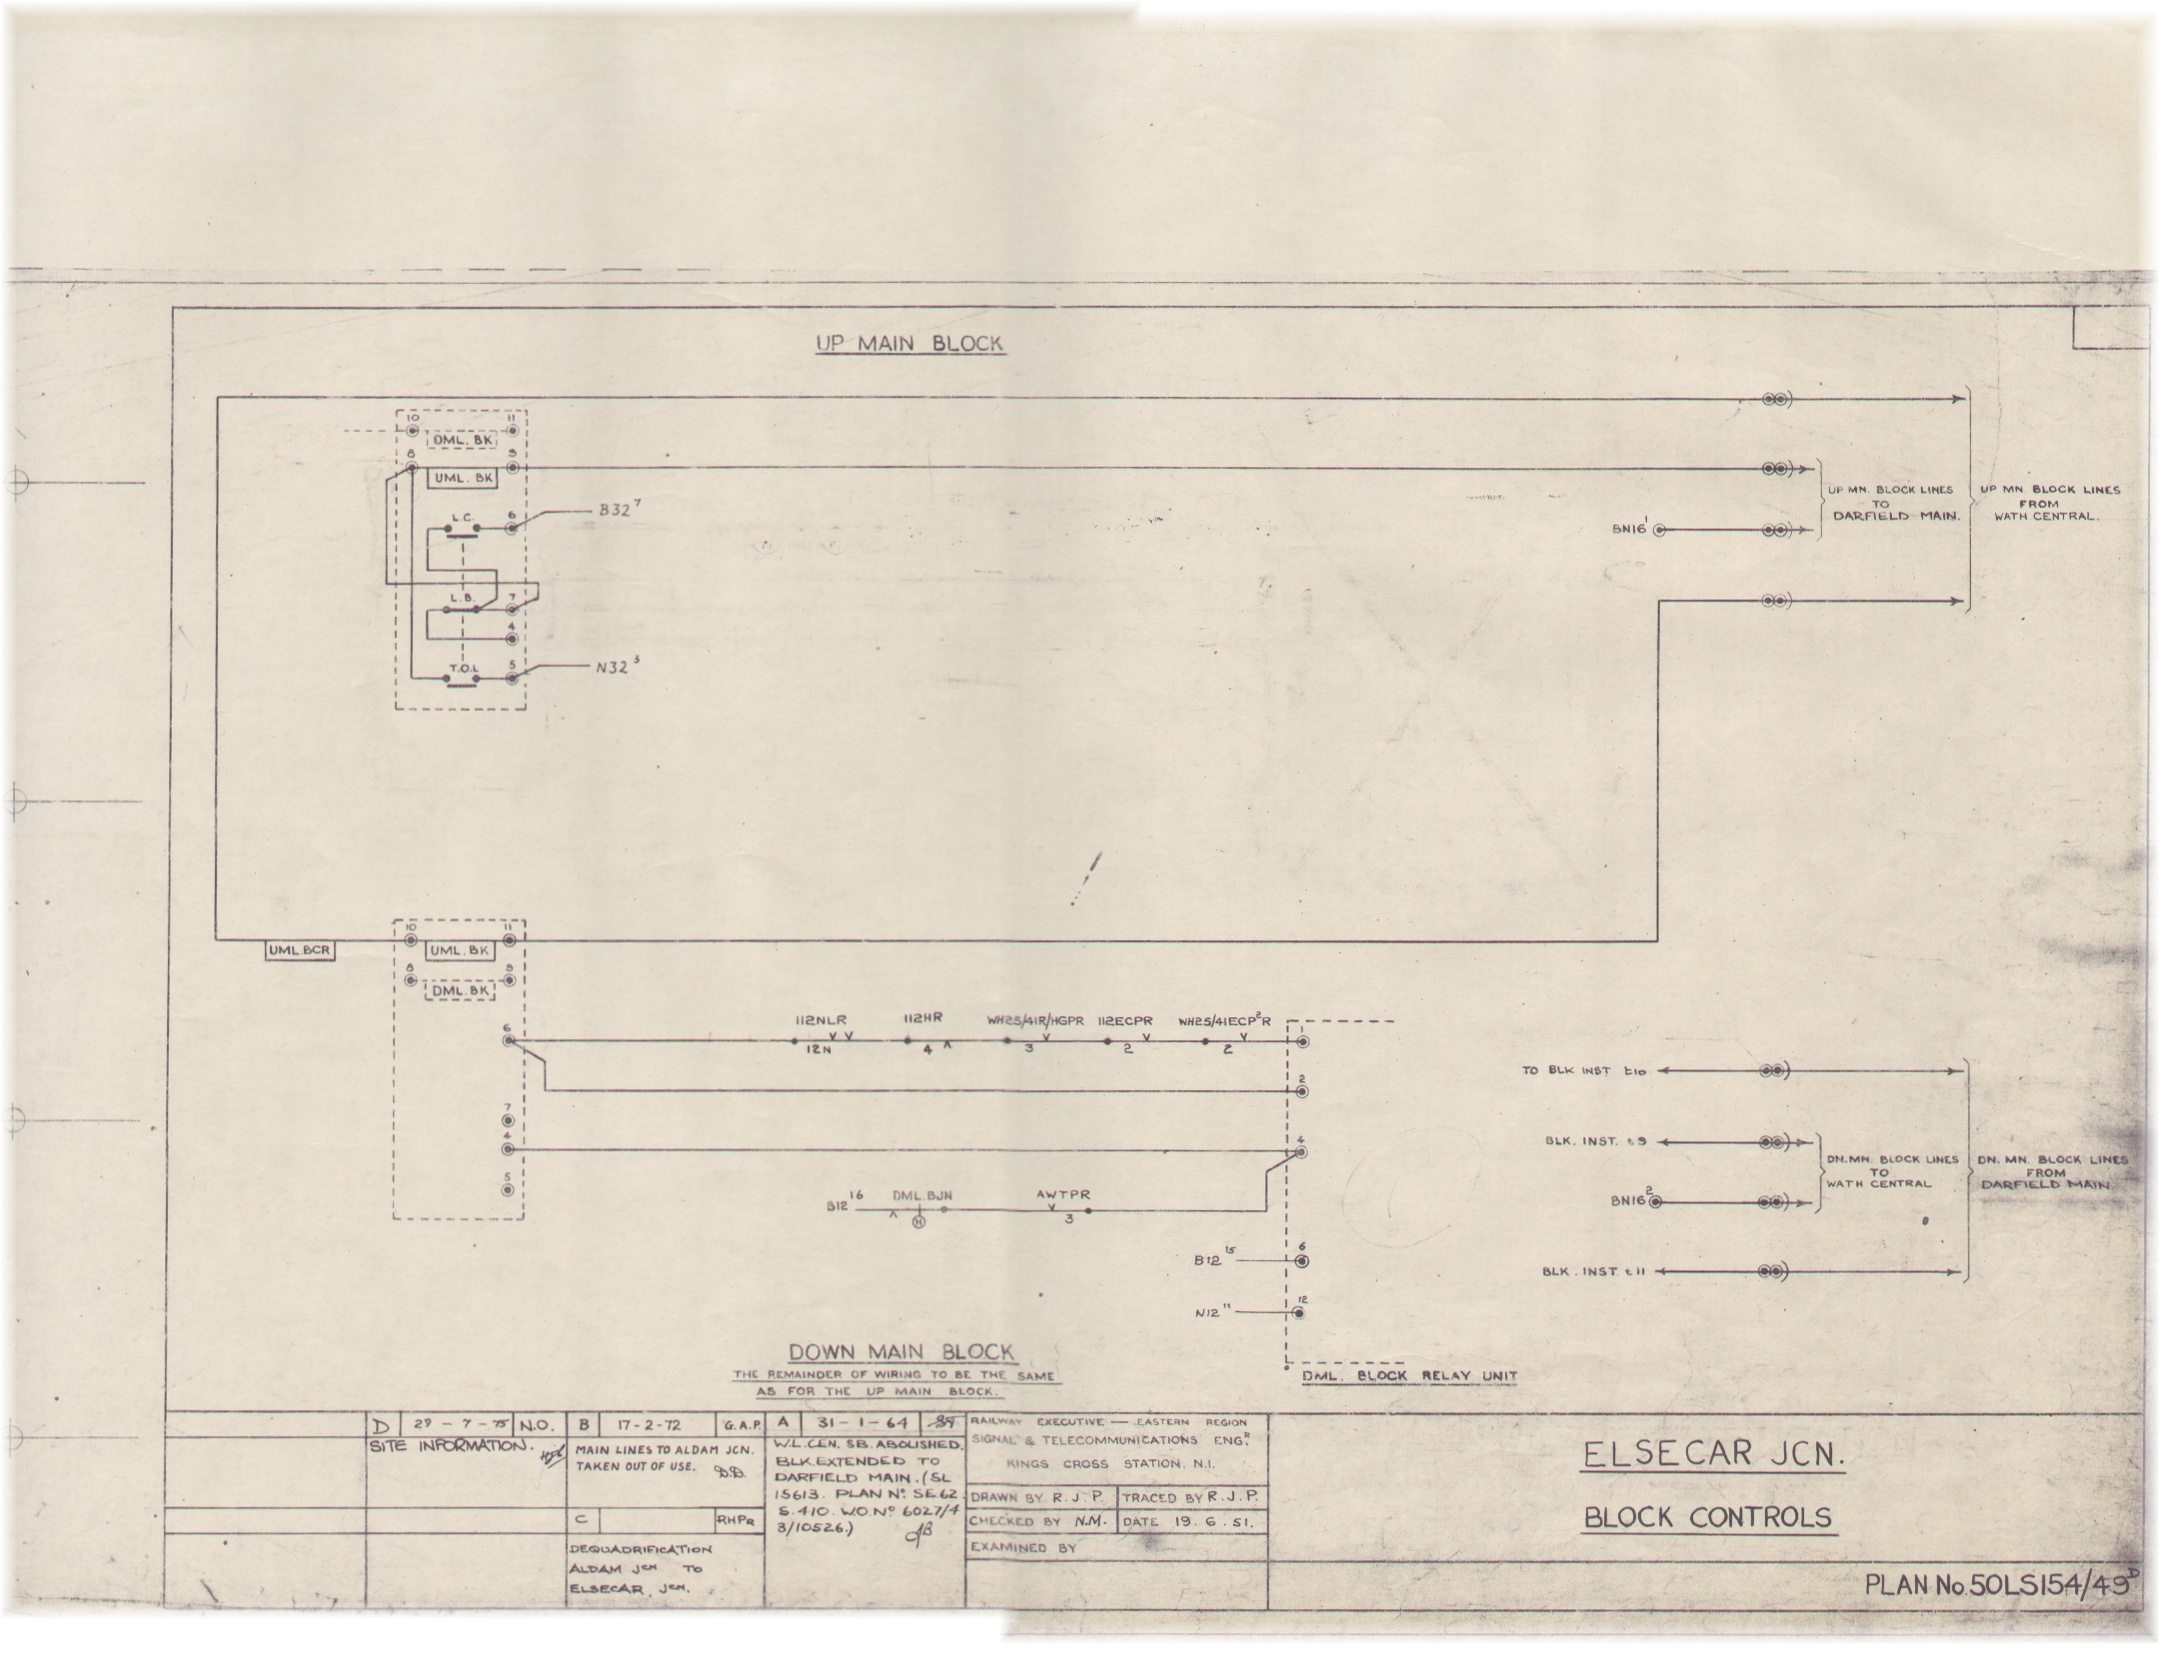
block was not used with the BZR1 relay unit. In fact, the fact there is only one
connection to terminal 6 could
indicate this instrument was used without any controls at all
(compare with SWD 302 with the
Elsecar Junction
block circuits showing free block to Darfield Main).
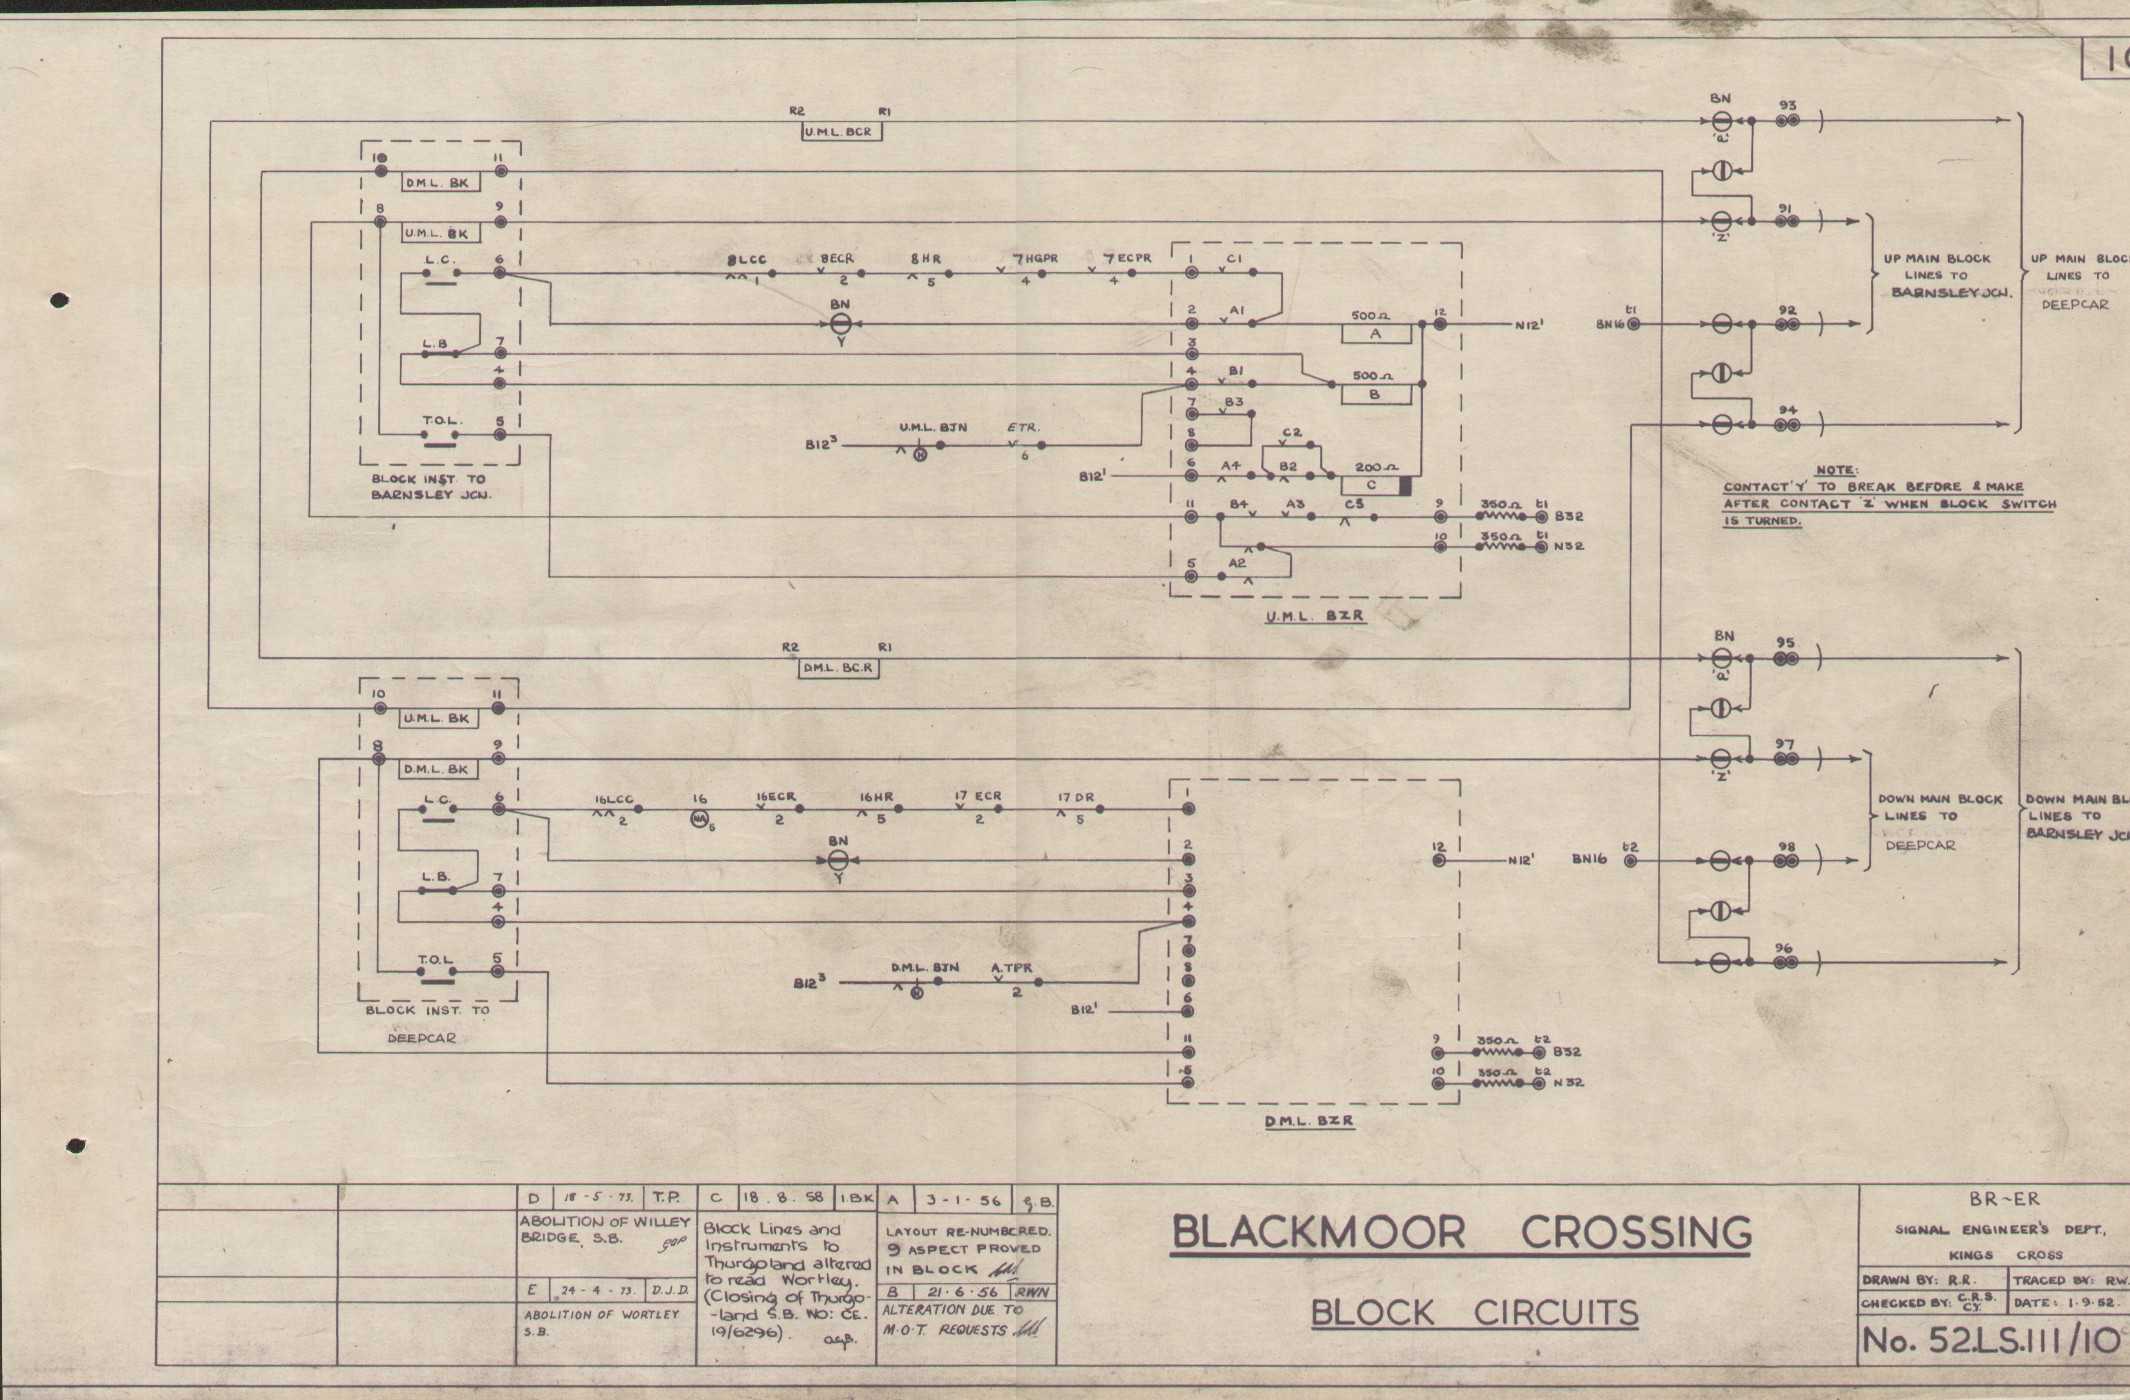
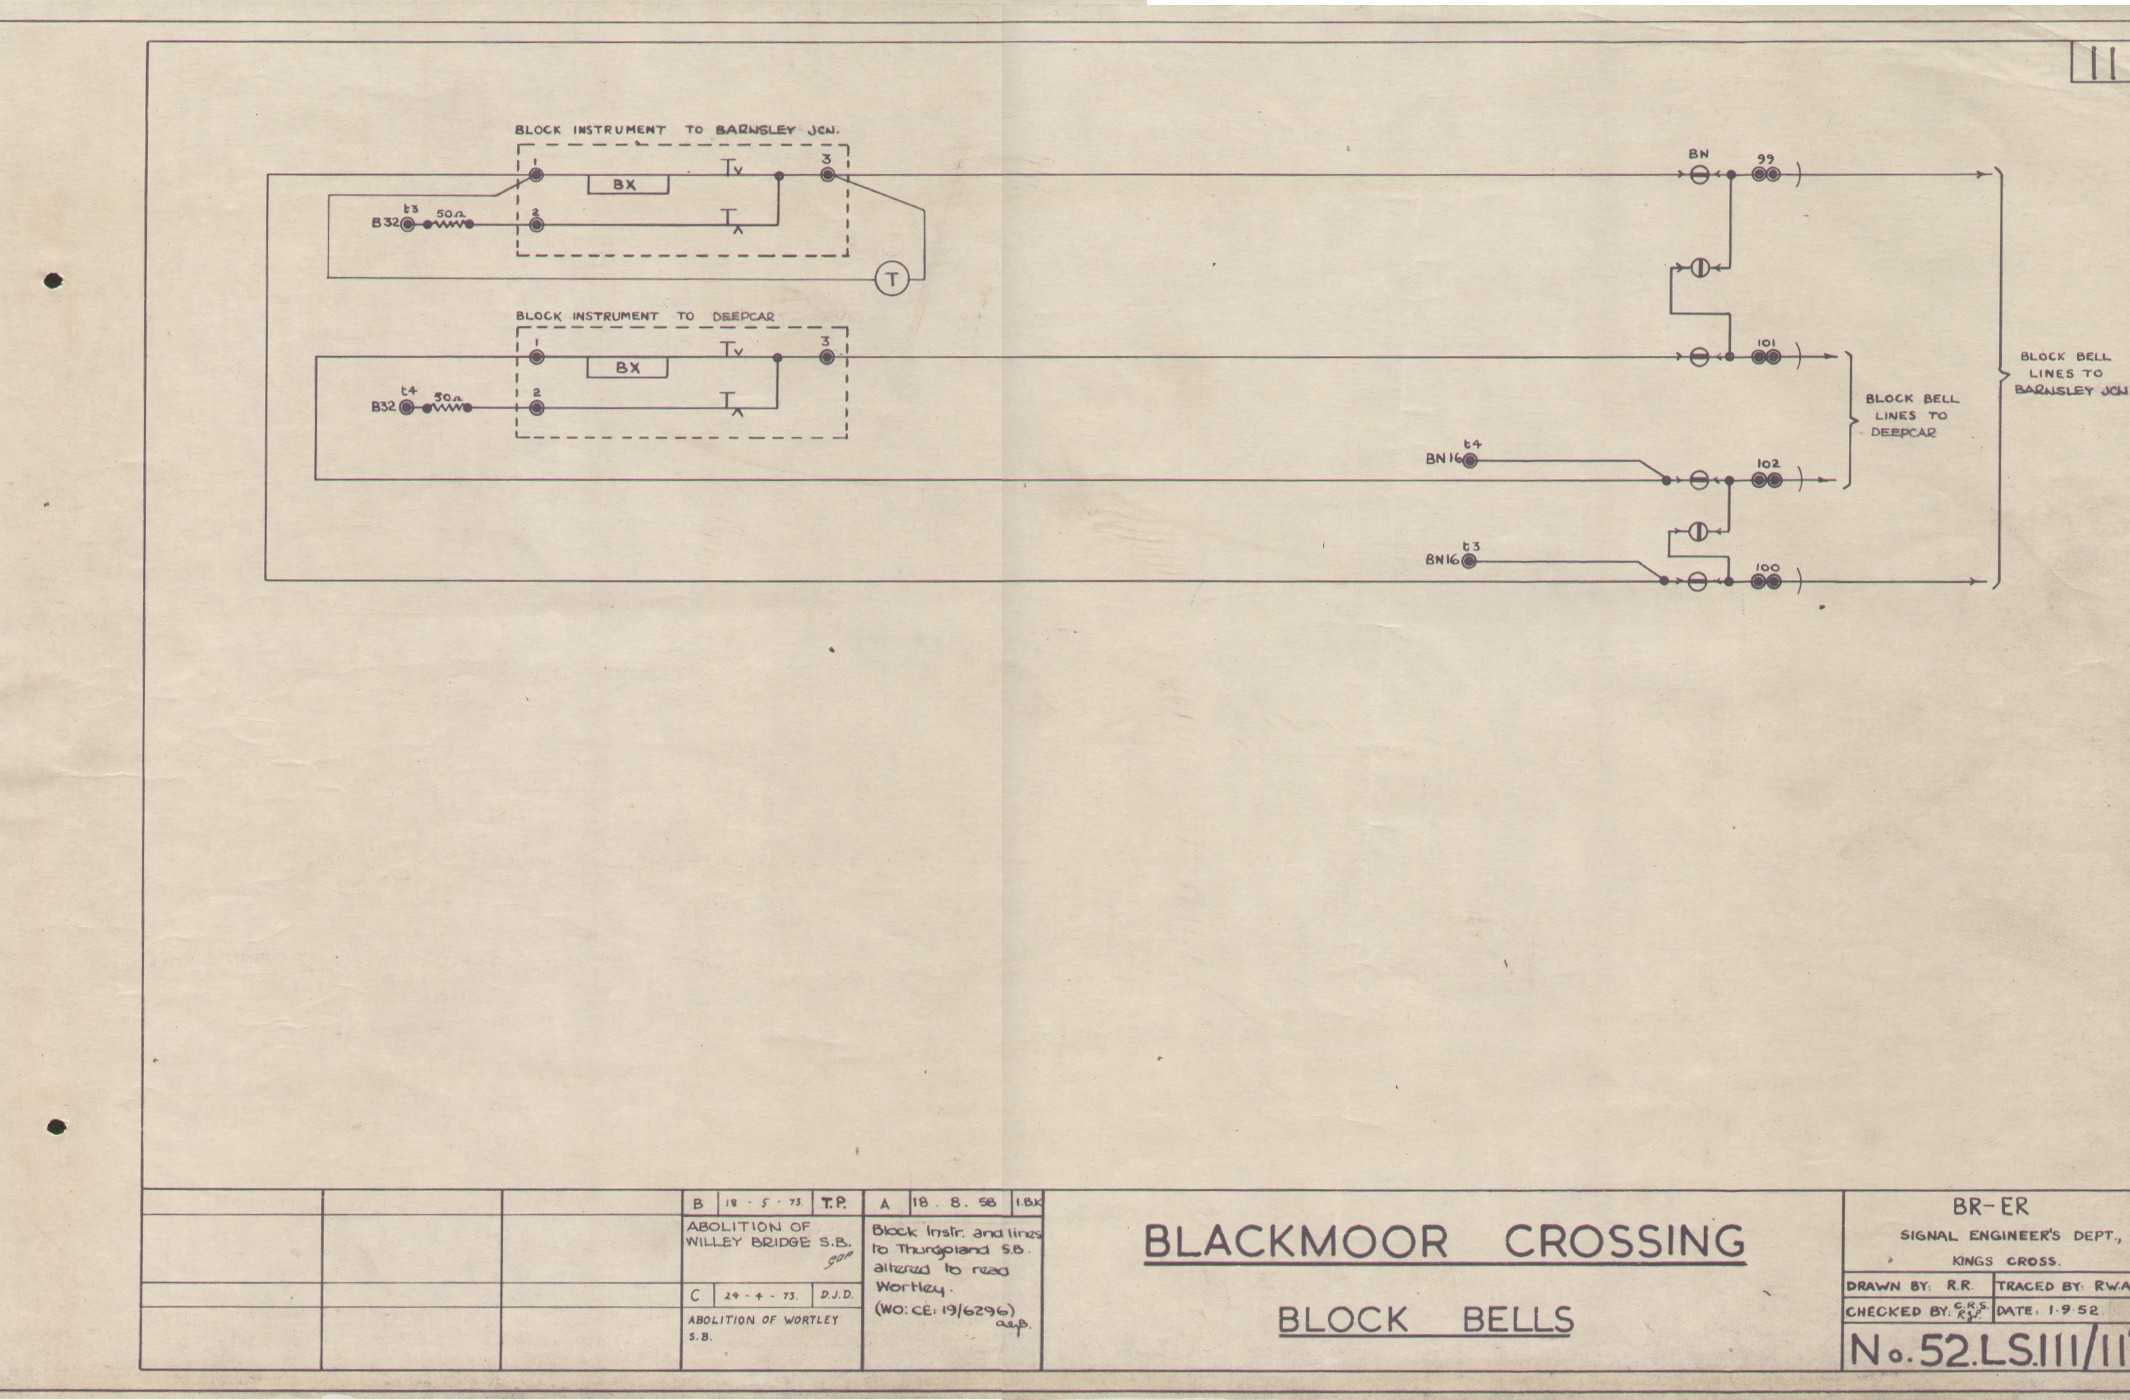
Example 4 - Blackmoor Crossing Block Circuits
The Tyer Black Box instruments were very common on the eastern side
of the Woodhead Route, from Rotherwood to Woodhead; most of the signal boxes,
of which I have seen interior photographs or other evidence,
had this type of instrument with the characteristic rectangular Welwyn release
nearby on the block shelf.
Here are the wiring diagrams for Blackmoor Crossing:
block circuits and
block bells. These diagrams actually refer to the
relay unit as BZR and not BZR1; it is not clear to me what the difference is.
Unfortunately, whoever removed the instrument
did a very thorough job, and cut the wires so short that no wiring labels remain - a
pity, as these might have revealed its origin! But they didn't remove all evidence:
look carefully and you will see that terminals 7 and 8 are linked, also there is no
connection to terminal 4. This shows the
block was not used with the BZR1 relay unit. In fact, the fact there is only one
connection to terminal 6 could
indicate this instrument was used without any controls at all
(compare with SWD 302 with the
Elsecar Junction
block circuits showing free block to Darfield Main).
Example 4 - Blackmoor Crossing Block Circuits
The Tyer Black Box instruments were very common on the eastern side
of the Woodhead Route, from Rotherwood to Woodhead; most of the signal boxes,
of which I have seen interior photographs or other evidence,
had this type of instrument with the characteristic rectangular Welwyn release
nearby on the block shelf.
Here are the wiring diagrams for Blackmoor Crossing:
block circuits and
block bells. These diagrams actually refer to the
relay unit as BZR and not BZR1; it is not clear to me what the difference is.